Main vs. draft scenarios
Your main scenario is your live, official model. To protect it from accidental changes, Runway automatically creates a draft scenario anytime you make data edits. Once in draft, all your edits remain local—they won’t affect main or any other scenario unless you merge them.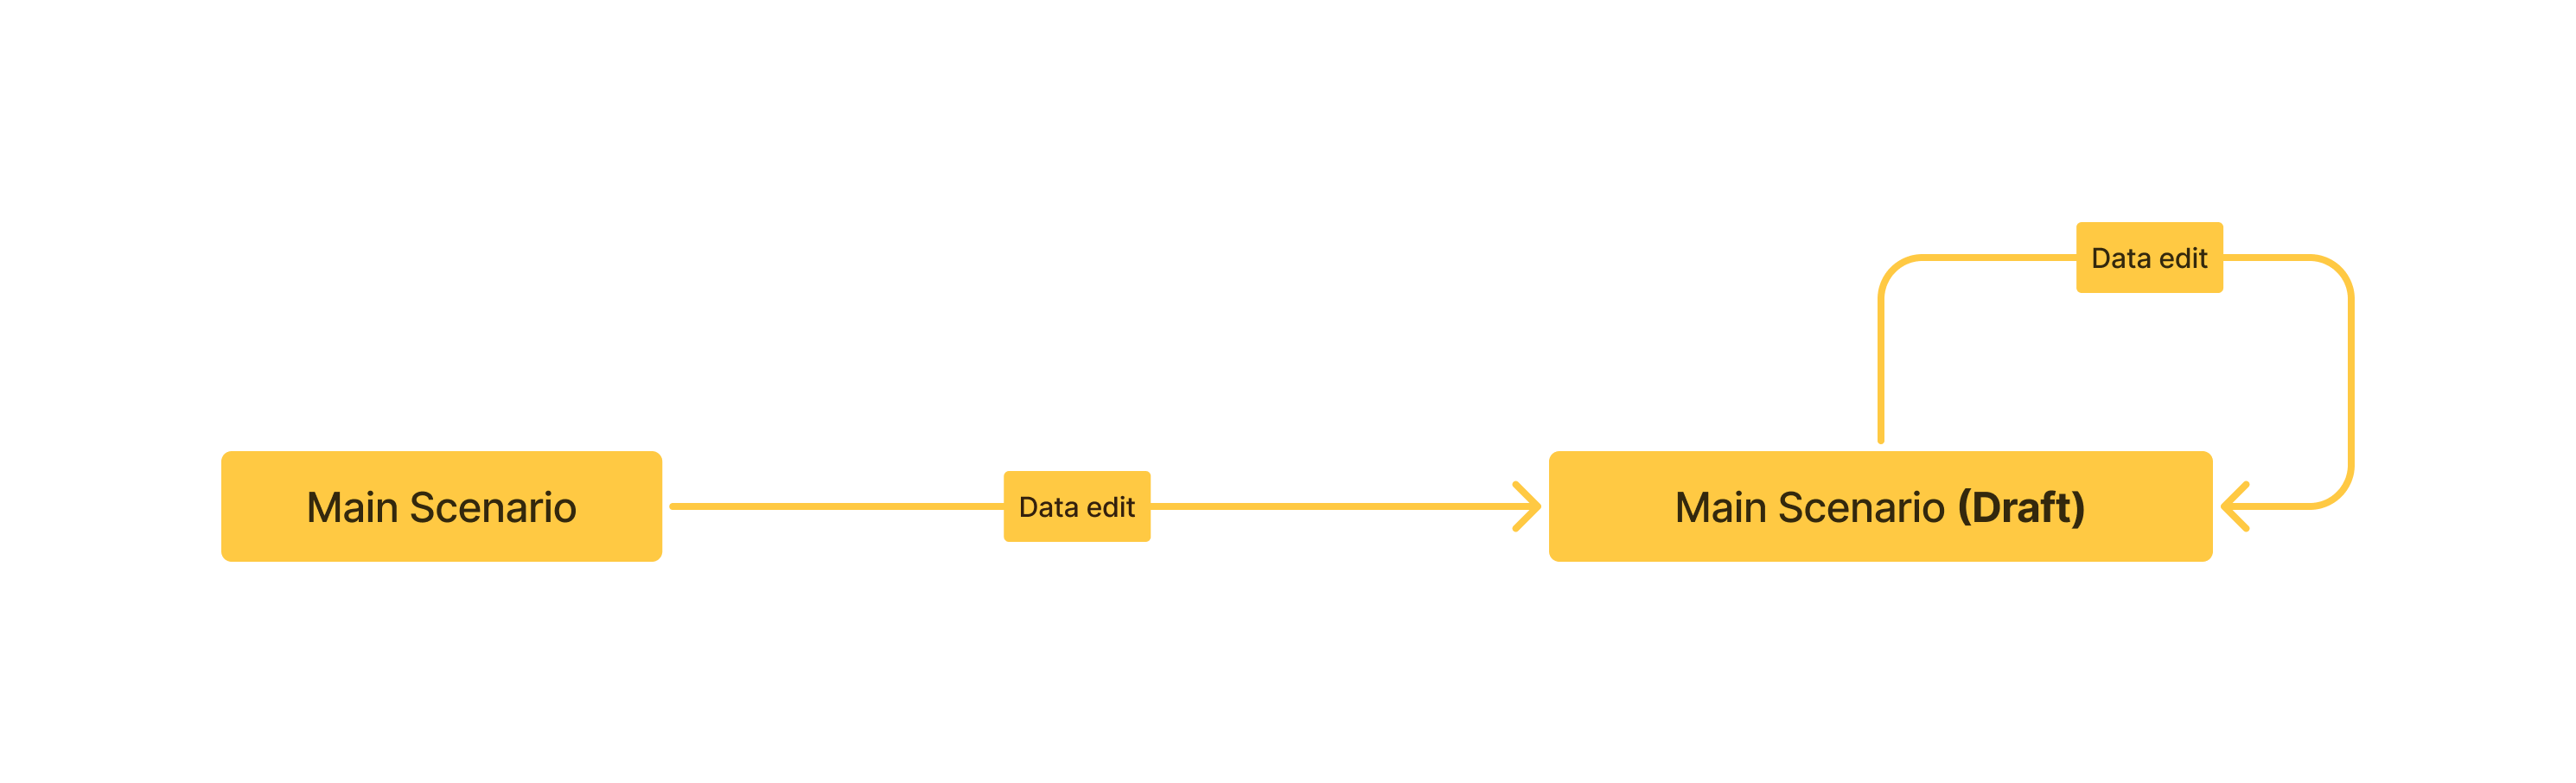
What counts as a data edit?
These specific actions—when performed in a main scenario—automatically move you into a draft scenario. When performed in a non-main scenario, the impact of these changes remains scoped to the scenario, until an Admin merges them into main.- Drivers:
- Creating, renaming, or deleting drivers
- Editing forecast, actual, or rollup formulas
- Modifying values (actual or forecast)
- Moving drivers between models or driver groups
- Adding/removing drivers from blocks
- Marking or unmarking a driver as KPI
- Changing formatting (name, color, precision, type)
- Models or databases:
- Creating or deleting models / databases
- Adding / removing database rows
- Editing formulas or modifying any database cell
- Changing database schema (data sources, dimensions, segmentation)
- Pages
- Creating, renaming, or deleting a page
- Creating or deleting blocks (e.g. table, chart, or text blocks) on pages
- Editing blocks (e.g. adding drivers to a chart block, or
- Reordering pages in the sidebar
- Creating or updating sidebar sections
What doesn’t count?
The following actions are applied directly to Main, and all scenarios with auto-updates enabled.- Changes to the ‘view’ of tables — like updating filters, sorts, groups, visible columns, and column width
- Adding, editing, or removing integration credentials
- Adding, editing, or removing integration queries and configuration
How to tell you’re in a draft scenario
Look for theDRAFT label in the scenario name.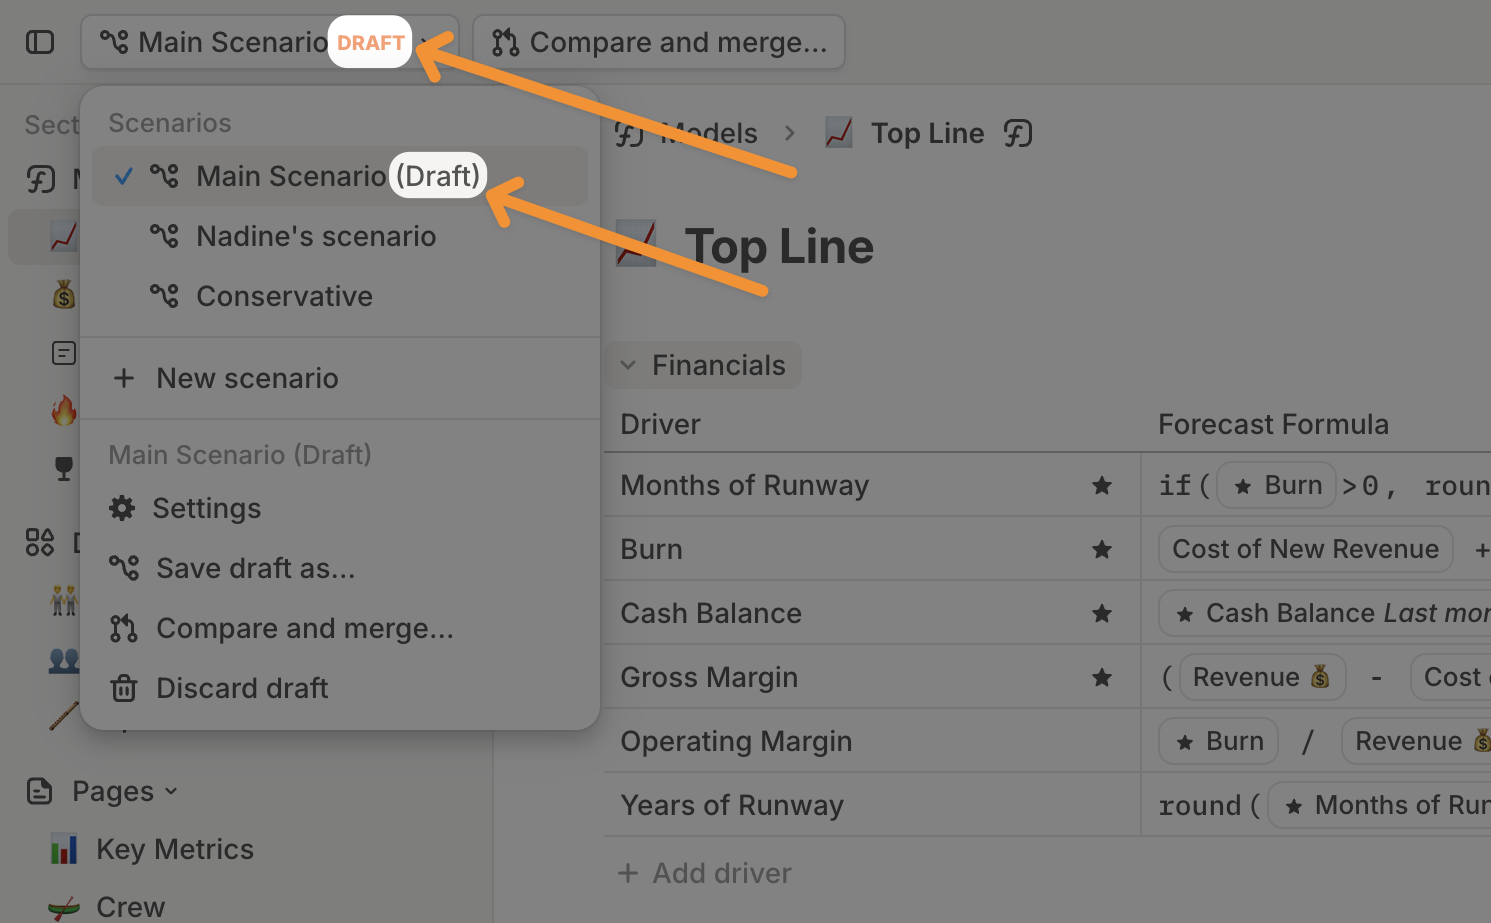
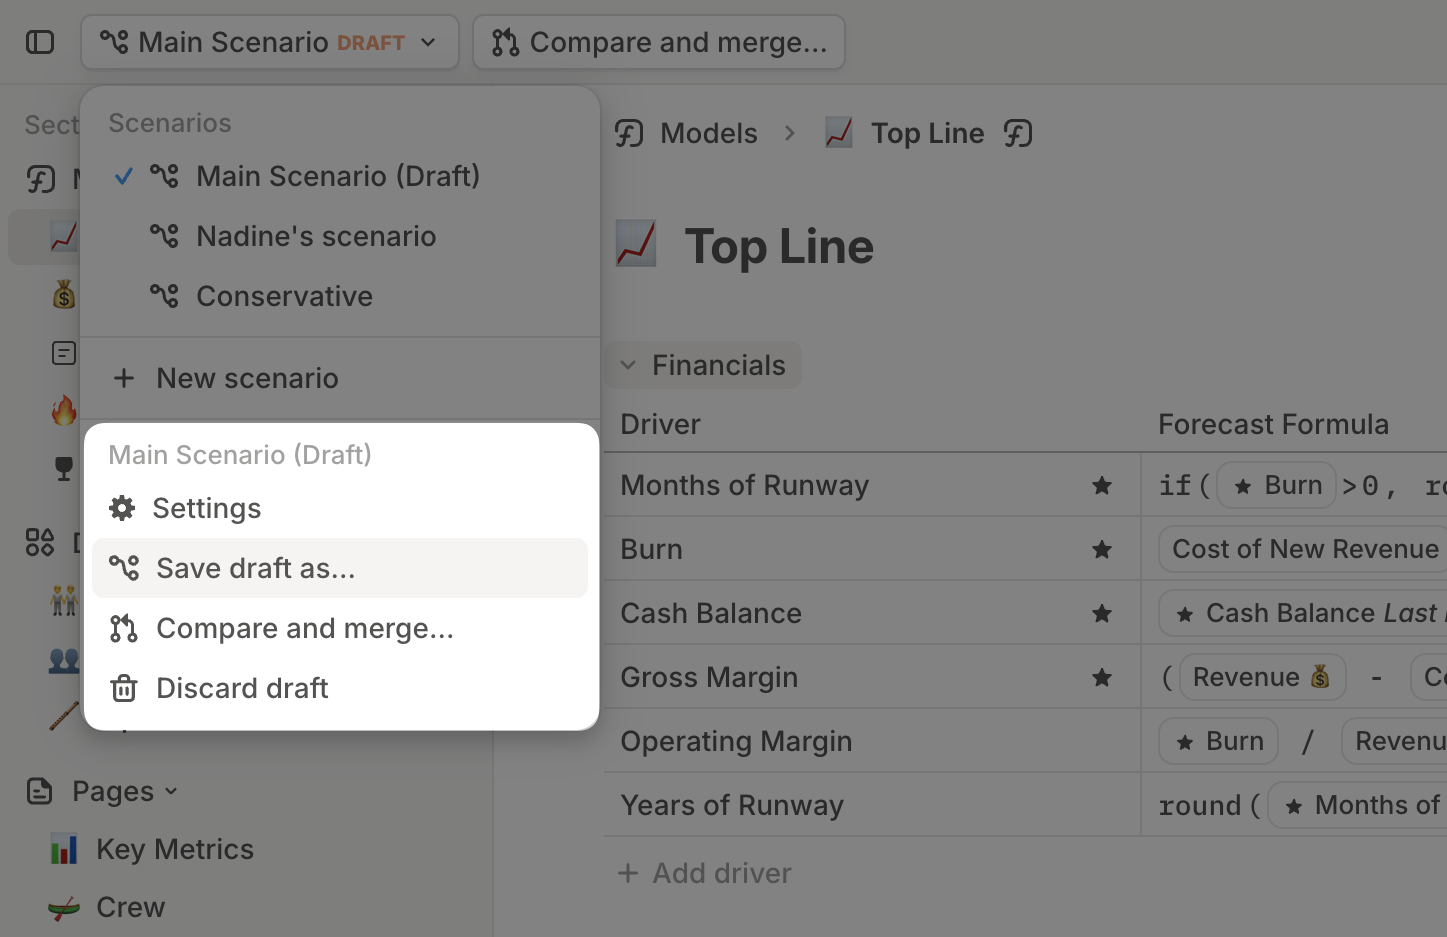
Managing a draft scenario
When working in a draft scenario, you’ll see these options (depending on your permission level):- Save draft as — creates a new standalone scenario for your edits.
- Compare & merge — merges your edits into the main scenario. (Admins only.)
- Discard draft — Removes all changes made in the drafts, and returns to main.
Creating a new scenario
To create a fresh scenario:- Click + New scenario in the scenarios list (top left).
- Give it a name, and choose an icon/emoji.
- The new scenario will be an exact copy of your main scenario. From there, you can start making edits that will only affect this scenario.
Alternatively, you can save a draft scenario as a new scenario using the
Save draft as option.
Merging scenarios
How to merge a scenario into main
Only Admins can merge scenarios. To do so:- Navigate to the scenario you want to merge (from the scenarios list).
- Click Compare and merge (top left). This will let you compare it against main scenario.
- Review the changes, and confirm the merge.
Use
Cmd / Ctrl + Shift + M to open the Compare and merge modal instantly.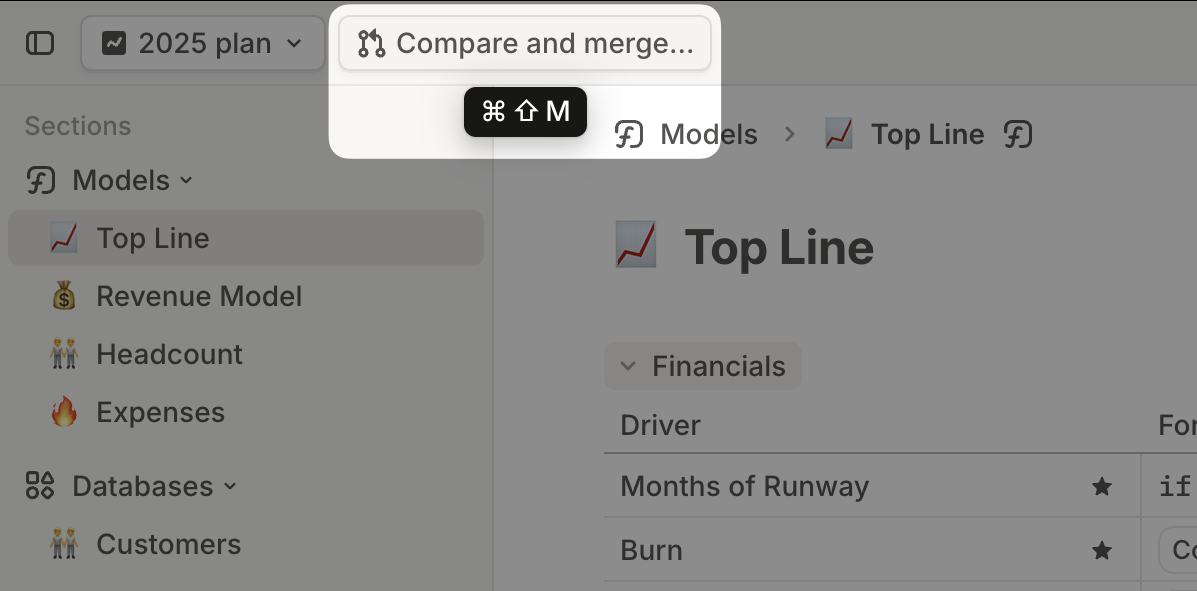
- Ask an Admin to merge your scenario for you.
- Share the scenario link by navigating to it from the scenarios list, and clicking Copy link.

How merging affects other scenarios
Scenarios work by layering edits on top of the main scenario. For example:- Let’s say Bob and Alice both edit Driver A in separate draft scenarios.
- At this point, both Bob and Alice see their own versions of Driver A in their separate draft scenarios.
- If Bob merges first, Alice still sees her own version of Driver A in her draft scenario.
- When Alice later merges, her changes overwrite Bob’s in the main scenario—which means Driver A in the main scenario will be updated to reflect Alice’s version.
- Bob creates a draft scenario where he modifies Driver B.
- Alice creates a draft scenario where she modifies Driver A.
- Alice’s version of Driver B is the same as the main scenario, because Bob’s edit isn’t merged into the main scenario they both share.
- But when Bob merges his changes:
- Alice sees the updated Driver B (based on Bob’s merge action).
- Alice still sees her own version of Driver A (based on her draft scenario).
Preventing main scenario updates from affecting your scenario
By default, all scenarios inherit updates from main unless they conflict with existing edits in that scenario. To prevent this, click the Settings icon next to a scenario name, then set Pull updates from Main to Disabled. After this, changes merged into main—including integration syncs—won’t affect this scenario.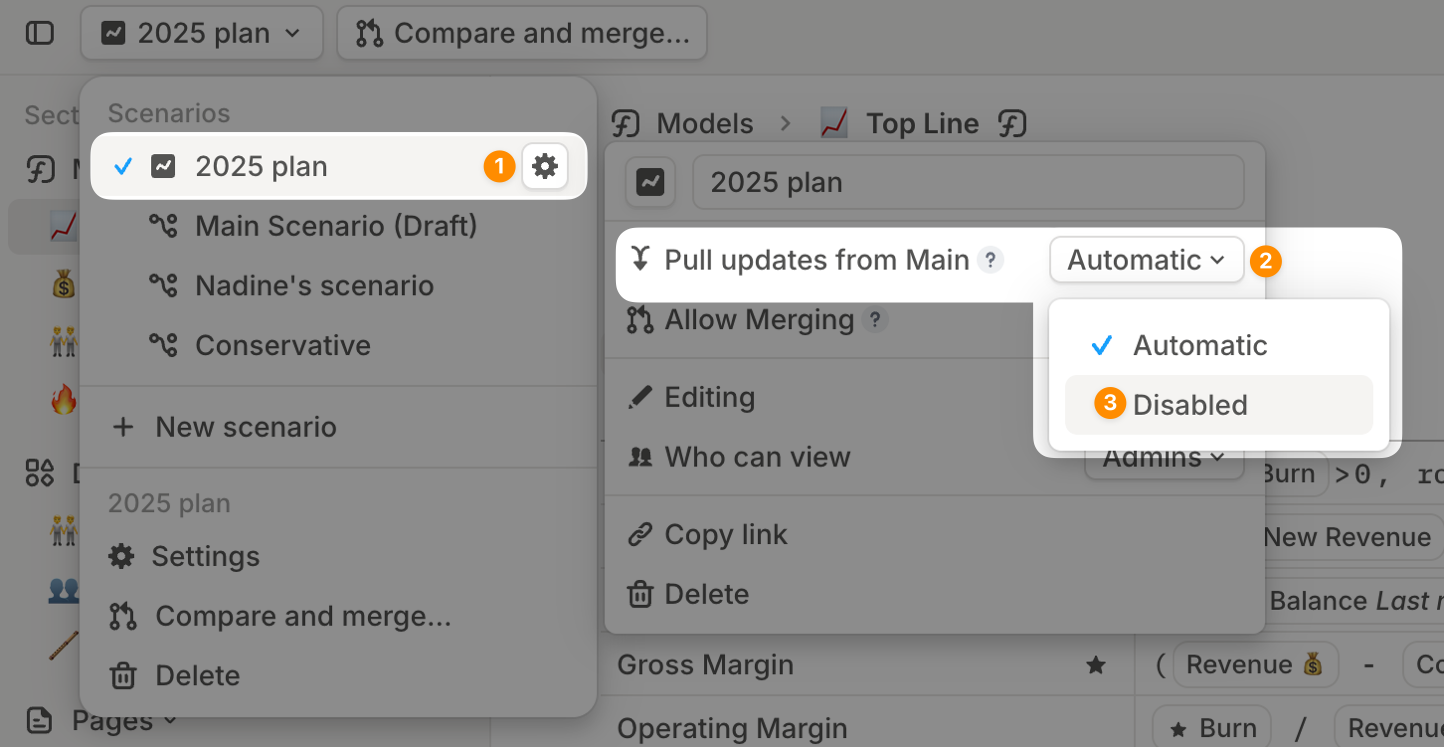 If you decide to re-enable this setting for the scenario, you can switch it back to Automatic. Keep in mind that doing so will instantly pull in any non-conflicting changes from Main—both existing and future changes. Depending on how different your scenario is from Main, it may look different after switching back to Automatic.
Scenario settings
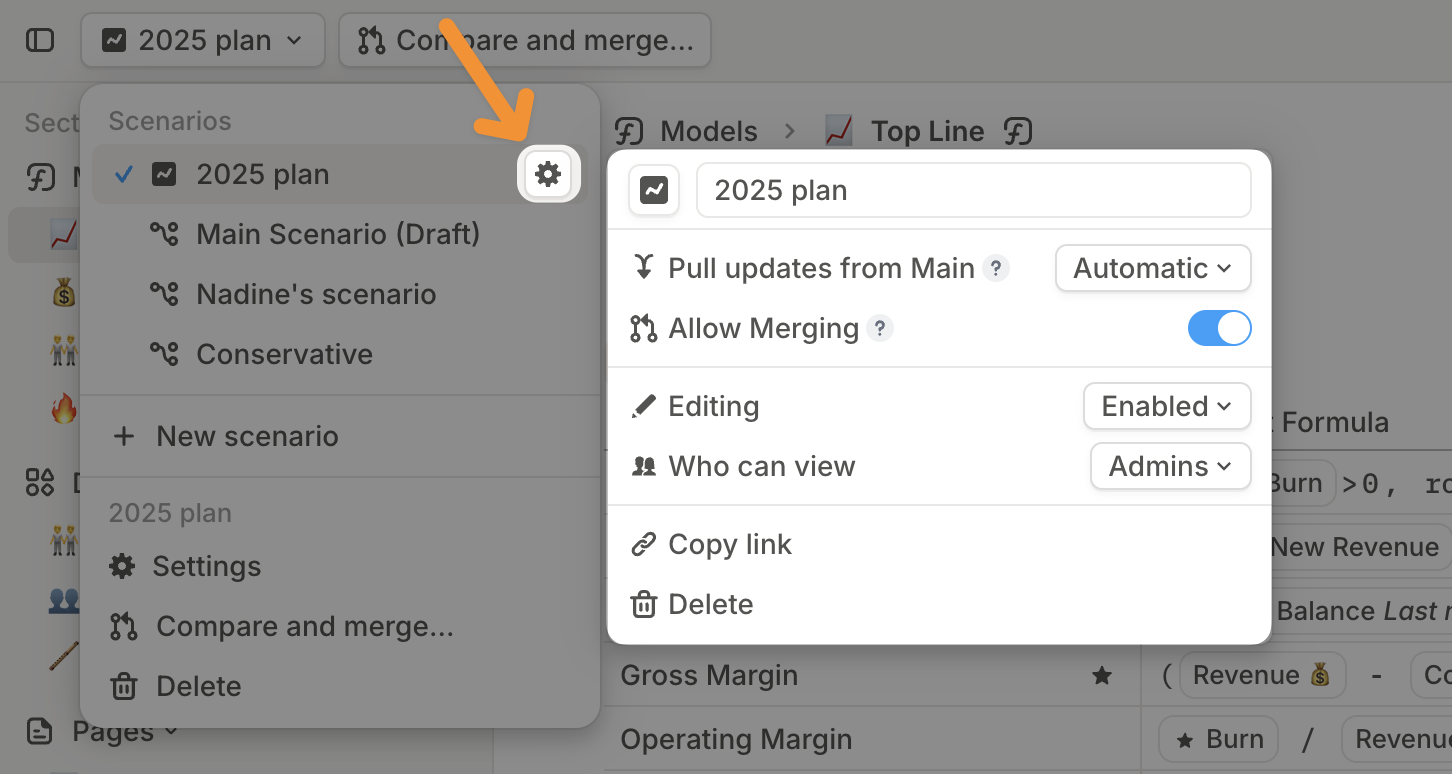
In the scenarios list, click the Settings icon next to a scenario name to adjust these options:- Renaming & changing icon – Update the scenario name, or emoji/icon.
- Pull updates from Main – Allow or block automatic updates from main scenario. This includes integration sync changes.
- Allow merging – Allow or block merging into main.
- Editing – Prevent anyone from making edits. (By default, any user with edit access to a page, model, or database can make edits across all scenarios they can view.)
- Who can view – By default, scenarios are visible only to Admins and the scenario creator. You can use this option to control who can access the scenario (only Admins, or all Managers and Members). Guests need to be given access to a scenario at either the model or page level.
- Copy link – Share any scenario with your team by sharing its link.
- Delete – Remove any scenario you no longer need.
Comparing scenarios
Tabular comparison in pages & models
You can compare values across multiple scenarios in a table format:- Open a model or create a Driver table in any page.
- Add the drivers you want to compare across different scenarios.
- Click Customize (top right) → Select Compare → Choose the scenarios you want to compare.
- Note that the default selection in this menu is “Current Scenario”, which will track the scenario selected in the top navbar.
- If you’d like to ensure a given set of scenarios is shown no matter which scenario you’ve selected in the navigation bar, you can deselect “Current Scenario” and define the scenarios to show explicitly.
- The default view shows time series values from each scenario. You can add Variance and Variance % from the same menu.
- Adjust table layout to show scenarios as rows or columns.
Graphical comparison in pages
You can also compare drivers across scenarios using line or column charts:- Create a Driver chart in any page.
- Add the drivers you want to compare across different scenarios.
- Click the Compare icon (top right) → Choose the scenarios you want to compare.
FAQ
Can I re-enable Pull updates from Main after disabling it?
Can I re-enable Pull updates from Main after disabling it?
Yes! However, when you switch back to
Automatic, it will immediately pull in both existing and upcoming changes from Main that don’t conflict with your scenario. Your scenario may look quite different after switching back to Automatic, depending on how much it differs from Main.How do I duplicate a scenario?
How do I duplicate a scenario?
Scenario duplication isn’t currently supported, but it’s on our radar. If this is important to you, please let us know—your feedback helps us prioritize future updates.